
CUB HOME PAGE > ELTS, HANDHELDS, & GPS
Adding some modern gear to a Piper Cub
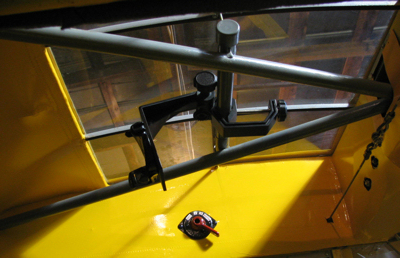
Where does the ELT go?
The question came up as to where the Emergency Location Transmitter should go. I don't have an opinion one way or another, but this is how it was mounted on Zero Six Hotel, the J-3 I rented at Hampton Airfield for the better part of ten years:
As you can see, it was mounted on the port side of the baggage compartment platform, behind the rear seat. The antenna came up through the same platform and was is secured with a plastic wire-tie to a frame member.

And the control switch for the ELT was mounted on the same panel as the magneto switch, where it could easily be reached from either the front or the rear seat.
Using a handheld radio in the Cub
[The following was posted to the Piper Cub Builders List by Lynn Towns, and was posted here with his kind permission. Scan down the page for other ways to mount a handheld in the Cub. -- Dan Ford]During the last winter, I started to plan a long cross country with a friend of mine who also owns a PA-11. He encouraged me to get a radio so we could communicate on the trip. I finally decided to give it a try. I bought an ICOM A23 handheld, and I tried using it in my Cub without a headset and with the rubber ducky antenna. I bought a RAM adjustable belt clip mount model# RAM-B-149-BC1 from Aircraft Spruce and Specialty to attach the radio to the windshield tubing near the throttle. The mount worked great, but I couldn't hear the radio at all while I was flying.
Then I bought a Lightspeed 25XL ANR headset. The ANR curcuit on the headset emits RF signals that were picked up by the radio antenna, making reception garbled. My friend said my transmission was fine. I exchanged the Lightspeed headset for a Pilot Avionics PA 17-79 DNC XL headset. After posting my problem on a newsgroup, other newsgroup members responded who had experienced the same problem. Several solved it with the Pilot headset. This system worked OK, but the range of transmission/reception was limited pretty much to the pattern; I would estimate 5 miles maximum.
MY PA-11 friend suggested an external antenna. He had been using a 1/4 wave whip antenna mounted on the wing root fairing with his ICOM. I believe he was getting 25 or 30 mile transmission/reception. I did some research, and decided the wing root fairing was not an adequate surface area for a ground plane. A folded dipole antenna that does not need a ground plane seemed like a better choice. I bought an Advanced Aircraft Electronics VHF-5T folded dipole antenna and installed it vertically on the left side of the fuselage fabric with duct tape. I was able to slide it between the side fuselage tubing/stringers and the fabric. The bottom end butts into the lower longeron, the upper end curves inward in the upper fuselage just below the stringers, and the antenna ends just past the top center wooden stringer. It is centered fore/aft in the second bay of the birdcage behind the baggage compartment. My mechanic said it is not considered a permanent installation, so no 337 is required.
The ICOM radio has a BNC antenna connector, so a few feet of coax finished the installation. There is extremely low loss without any adapters required using the ICOM handheld (unlike some handhelds that do not use BNC connectors). The performance is better than I ever dreamed. I regularly hear pattern traffic from airports 100 statute miles away, and I once heard someone that was approximately 200 statute miles away across flat land. I have transmitted to towers 50 statute miles away, and they said I was "loud and clear". I really don't know the limits of the transmission/reception distance, but it is more than adequate.
I'm convinced that this antenna installation is superior to any 1/4 wave ground plane antenna on a fabric covered plane. Besides, it is inside the fuselage where it doesn't show.
I was very happy with my communications capability, but my handheld also has a VOR receiver, and that didn't work too well using the vertical antenna. I reasoned that since the VOR signals are horizontal, I could add a vee-shaped horizontal antenna to get good VOR reception. So, I bought another Advanced Aircraft Electronics antenna and installed it in the birdcage, in a horizontal vee-shape with the open side facing forward, in the first bay behind the baggage compartment. I mounted it on the fuselage tubing using balsa wood and nylon cable ties.
Since the ICOM only has one antenna connector, I wanted a way to switch between the two antennas. I posted on a newsgroup again, and got a suggestion from a pilot/ham operator. At his suggestion, I found and installed a Dow-Key (>.1 db insertion loss) coaxial switch to easily switch between the two antennas.
The results using the vee-shaped antenna were mixed. Something (probably the engine/prop) partially blocks the signal from the front, and the forward VOR reception is only about 20 miles. Anywhere behind the wings it is 40-50 miles, so it works well going from a VOR, but not as well going to a VOR. My main purpose in having it was to be able to duplex to Flight Service Stations, so I can always temporarily turn if I have to. The VOR also provides a backup for my GPS, but I have yet to use it for navigation.
Surprisingly, the horizontal vee antenna works very well as a communications antenna. Communication range with the vee-shaped antenna is at least 50 miles. In fact, it works better than the vertical antenna when communicating with someone directly above or below me (which often happens in the pattern). If I was going to do it over again, I would only install the horizontal vee antenna and eliminate the other antenna and the selector switch.
I eventually bought another Pilot 17-79 headset and a Pilot PA 200-A23 intercom that plugs directly into the ICOM radio (doesn't require a headset adapter, and comes with a velcro mounted PTT switch). Using the intercom with matched headsets does not require separate squelch controls for each headset (this may become a problem with unmatched headsets). Intercom volume is adjustable separately from the radio volume.
I am completely satisfied with this system. I think the folded dipole antenna makes a handheld radio have equivalent performance of just about any panel-mount radio. And, you can install the entire system yourself. The only improvement I can even think of would be an increase of forward VOR range, and I think that would require a VOR antenna mounted somewhere outside of the fuselage.
Last spring, my PA-11 friend and I took our 73 flight-hour, 16 day cross-country in our planes (Michigan to southern California, up to Oregon, and back). It was great fun. My headset was comfortable for the entire time, and the only problem I had with my radio is that twice I transmitted too much and the rechargeable battery went dead.
Now that I have a radio again, I feel safer. I have a better idea who else is in the pattern, and where they are. It is comforting to know I can call Flight Service in marginal weather, and the headset makes flying quieter, more comfortable, and less fatiguing. So far, the dependability of the radio has been very good. I'm a happy Cub pilot!
And what to do with the GPS?
Of course I learned to fly with a chart and a circular slide-rule, but when GPS became available I acquired a little Garmin III+ and used the low-tech mount shown here. Later I replaced it with a much heftier 296, which was top-heavy for the bracket, so I bought a G-Force suction cup mount that went on the window. It worked fine, but I leave the picture-frame solution here for what use it might be, plus I've added several more that have come in over the years. — Dan Ford The Garmin III+ was the grandest thing that ever happened to Zero Six
Hotel--but oh! the trouble I had using it. I'd stick it in my breast
pocket, or in the map pocket behind the front seat, and I always had to
fumble before I could use it. Then I read about this idea: mount it
on an inverted plastic picture frame, and put the frame in the map pocket.
Well, that didn't work because the base of the frame interfered with the
stick. Then I realized that I could simply invert the picture frame over the
front seat, as shown above.
The Garmin III+ was the grandest thing that ever happened to Zero Six
Hotel--but oh! the trouble I had using it. I'd stick it in my breast
pocket, or in the map pocket behind the front seat, and I always had to
fumble before I could use it. Then I read about this idea: mount it
on an inverted plastic picture frame, and put the frame in the map pocket.
Well, that didn't work because the base of the frame interfered with the
stick. Then I realized that I could simply invert the picture frame over the
front seat, as shown above.
With a wood rasp, I smoothed the base of the III+ to get the widest possible surface to attach a piece of industrial-strength Velcro from Ace Hardware. (The thin strip of Velcro that came with the Garmin was useless.) The matching piece of Velcro went on the base of the picture frame. Since my pack always rode in the front seat, and since the pack was strapped in place by the front harness and seat belt, the rig was very stable. (I didn't normally carry a front-seat passenger.)

Mark Lund sent me this photo of his GPS mounted with one of those handyman
clamps from the local hardware store. It appears to be fastened to a bit
of aluminum angle, and that in turn is Velcro'd to the GPS. Also note his
handheld receiver, mounted to the windowframe, and the intercom perched on
the port overhead tube. The wire coming down to the seat is the push-to-talk
switch.
 Finally, here's a handsome "panel" for the
back-seat Cub driver. As Jack Schaul explained: "Remove the leather seat
cover [and] canvas seatback. Cut a piece of 1/8th inch marine plywood to
fit in the space formed by the seat back tubing. Center fore and aft. Attach
with four adel clamps. Attach your Garmin GPS and com radio to the plywood
using Ram round-a-mount
item B-149z-G1K for the GPS and B-138-BC1-K for your com radio.
Mount them low enough so the tops of both are below the top of the
stick. With full forward stick your knuckles and the stick will
not be interfered with.
Finally, here's a handsome "panel" for the
back-seat Cub driver. As Jack Schaul explained: "Remove the leather seat
cover [and] canvas seatback. Cut a piece of 1/8th inch marine plywood to
fit in the space formed by the seat back tubing. Center fore and aft. Attach
with four adel clamps. Attach your Garmin GPS and com radio to the plywood
using Ram round-a-mount
item B-149z-G1K for the GPS and B-138-BC1-K for your com radio.
Mount them low enough so the tops of both are below the top of the
stick. With full forward stick your knuckles and the stick will
not be interfered with.
"Remove the GPS and Radio at the lower ball. Re-install the canvas seat cushion and the leather seatback. Cut holes just big enough to allow the ball of each mount to protrude through the leather seatback. The postion of the mount balls are located inside the pouch of the seatback. Re-attach the GPS and Radio at the balls. All Headset and ant. cables can be routed inside the seatback pouch and out the bottom. Very clean. The GPS is low enough to be better hidden from the sunlight for better clarity. When the GPS and Radio are removed the mounts are not visible without digging in the seatback pocket."
Paul Robbins just
adapted the bracket supplied by Garmin. "The GPS 296 mount is attached
to a PVC pipe secured to the overhead framing and it easy to see
and accessible and the satellite reception is good as there are no
overhead obstructions." The pipe has slits in each end to fit
over the thin vertical rods, with an end cap overall, so it can
easily be removed."
Question? Comment? Newsletter? Send me an email. Blue skies! -- Dan Ford

Other websites: the Warbird's Forum | Daniel Ford's books | Facebook | Sail Alaska's coast | Reading Proust
Posted August 2019. Websites © 1997-2019 Daniel Ford; all rights reserved. This site sets no cookies, but the Mailchimp sign-up service does. So does Amazon if you click through to that store.